Step 1: Connect Your Abuse Mailbox
Connecting your abuse reports to Abusix for processing is easy and essential for setting up Guardian Ops. We will parse your abuse data and extract numerous details that will give you an exact idea of what is happening on your network. Abuse reports sent to your abuse@ address (e.g., [email protected]) should be routed to the SMTP email address (Datachannel) provided by Guardian Ops. You can send multiple mailboxes to one SMTP Datachannel, but we recommend creating a single Datachannel for each mailbox. Make sure your email server sends an actual copy of the original email and doesn’t package it into a new email.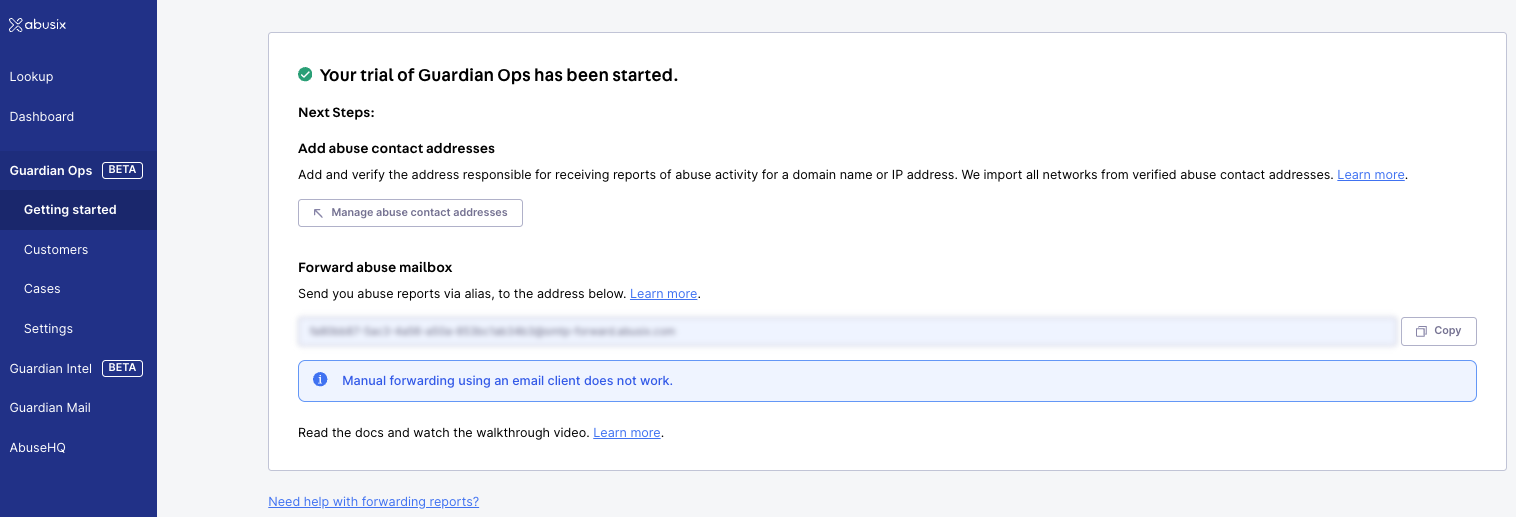
⚠️ Forwarding from an email client is not supported!You can find the default SMTP Datachannel within Guardian Ops after starting your trial. For more information on connecting your abuse data, see the abuse management page documentation.
Forwarding using an email client changes the formatting of messages, headers, and every email client changes the formatting differently. Therefore we can’t guarantee reliable parsing.
Step 2: Understand Your Customer List - Configure Inbound Processing
By default, Guardian Ops sets the IP as customer ID. This is a great starting point for setting up and learning about the different features. ⚠️ Step 3 will explain how you can expand the default configuration of Customer Resolution See the Customers section in Guardian Ops that aggregates all incoming events according to their customer IDs. This provides an instant overview of fraudulent accounts in your network, sorted by abuse volume. Inbound Processing, located in the Guardian Ops settings, gives you the power to decide which events reach Guardian Ops and how to enrich and aggregate those events first to customer entities and later to cases. The configurable Inbound Processing Flow Chart presents the journey of your events before they end up in Guardian Ops.- The “Incoming Events” (input node) is where parsed email and API events (XARF) enter the inbound processing flow.
- Events are then triaged and assigned with an event type.
- Finally, data is sent to Guardian Ops, where it is aggregated.
Configuring Inbound Processing
To configure Inbound Processing:- Click Settings under Guardian Ops in the left-hand menu where the Inbound Processing tab is located.
- Click Inbound Processing in the top navigation bar.
- Create a new draft by clicking the New Draft button.
- Drag and drop a node from the top left of the grid.
Saving and Activating the Flow
- After adding the nodes and configuring them, make sure to give the draft a proper name.
- Click the Save button to save your changes.
- To activate the flow, click the Activate button.
Step 3: Set Up Customer Resolution
Guardian Ops requires a customer identifier to process abuse reports. This can be achieved in two ways:- API requests:
Guardian Ops can call your API with data from reports (e.g. IP address, timestamp when the event occurred, port, etc.) to retrieve the correct customer identifier and related information (customer, contract or tenant data). We strongly recommend this approach, especially for dynamic IP assignments or when additional metadata is needed. Oftentimes, IPs or domains change, but the fraudulent customer or contract stays the same. Abuse reports with changing IP addresses or domains that belong to the same customer can only be aggregated when using API customer resolution. - Static fields:
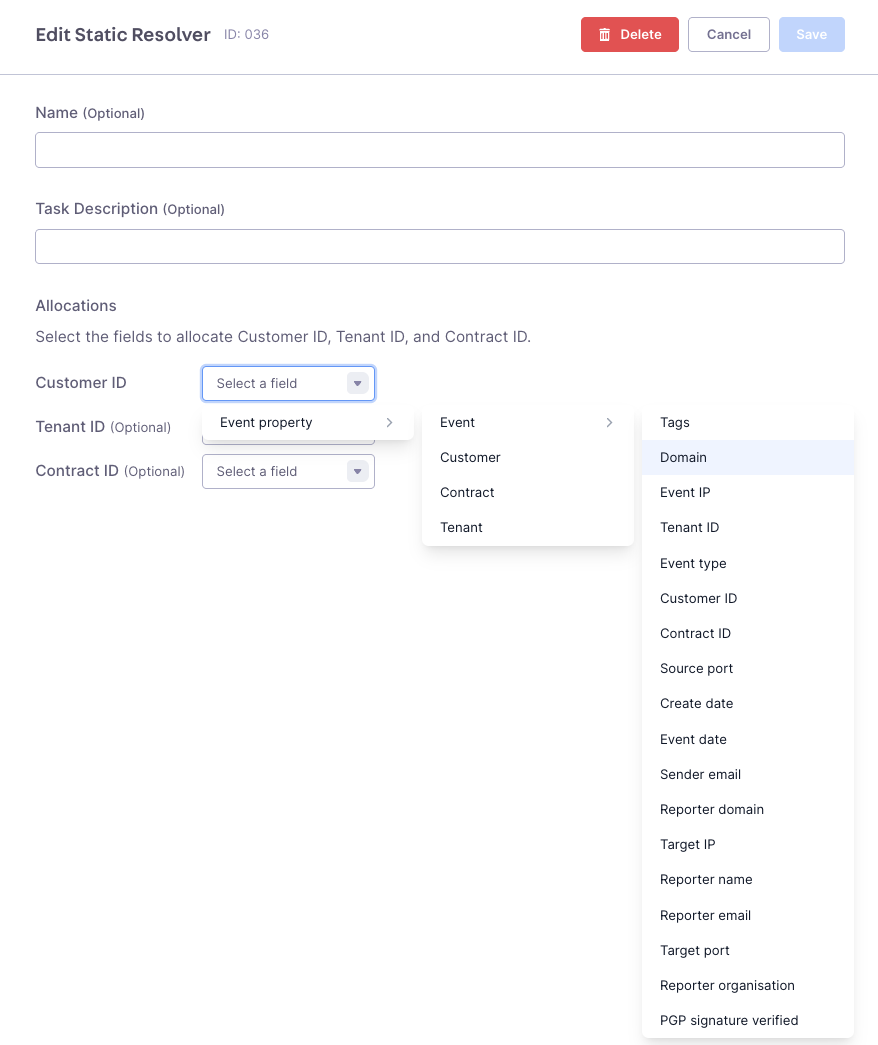
Guardian Ops maps values from any event attribute (IP addresses, domains, headers, etc.) to customer_id, tenant_id, and contract_id fields. If you cannot use resolution via API, we recommend to use static resolving using IP or domain.
- API Resolution
- Static Resolver
Customer Resolution via API provides the most flexibility, enabling dynamic resolution and customer enrichment. Most importantly, it aggregates abuse reports to the same customer even when IPs or domains change - tracking the fraudulent actor, not just their current infrastructure.
It allows you to pass information (such as the IP address, event timestamp, port, etc.) from an abuse report to your API endpoint. Your backend system (e.g., CRM or RADIUS) then returns the correct Customer Identifier and, if you want, other data that Guardian Ops can store.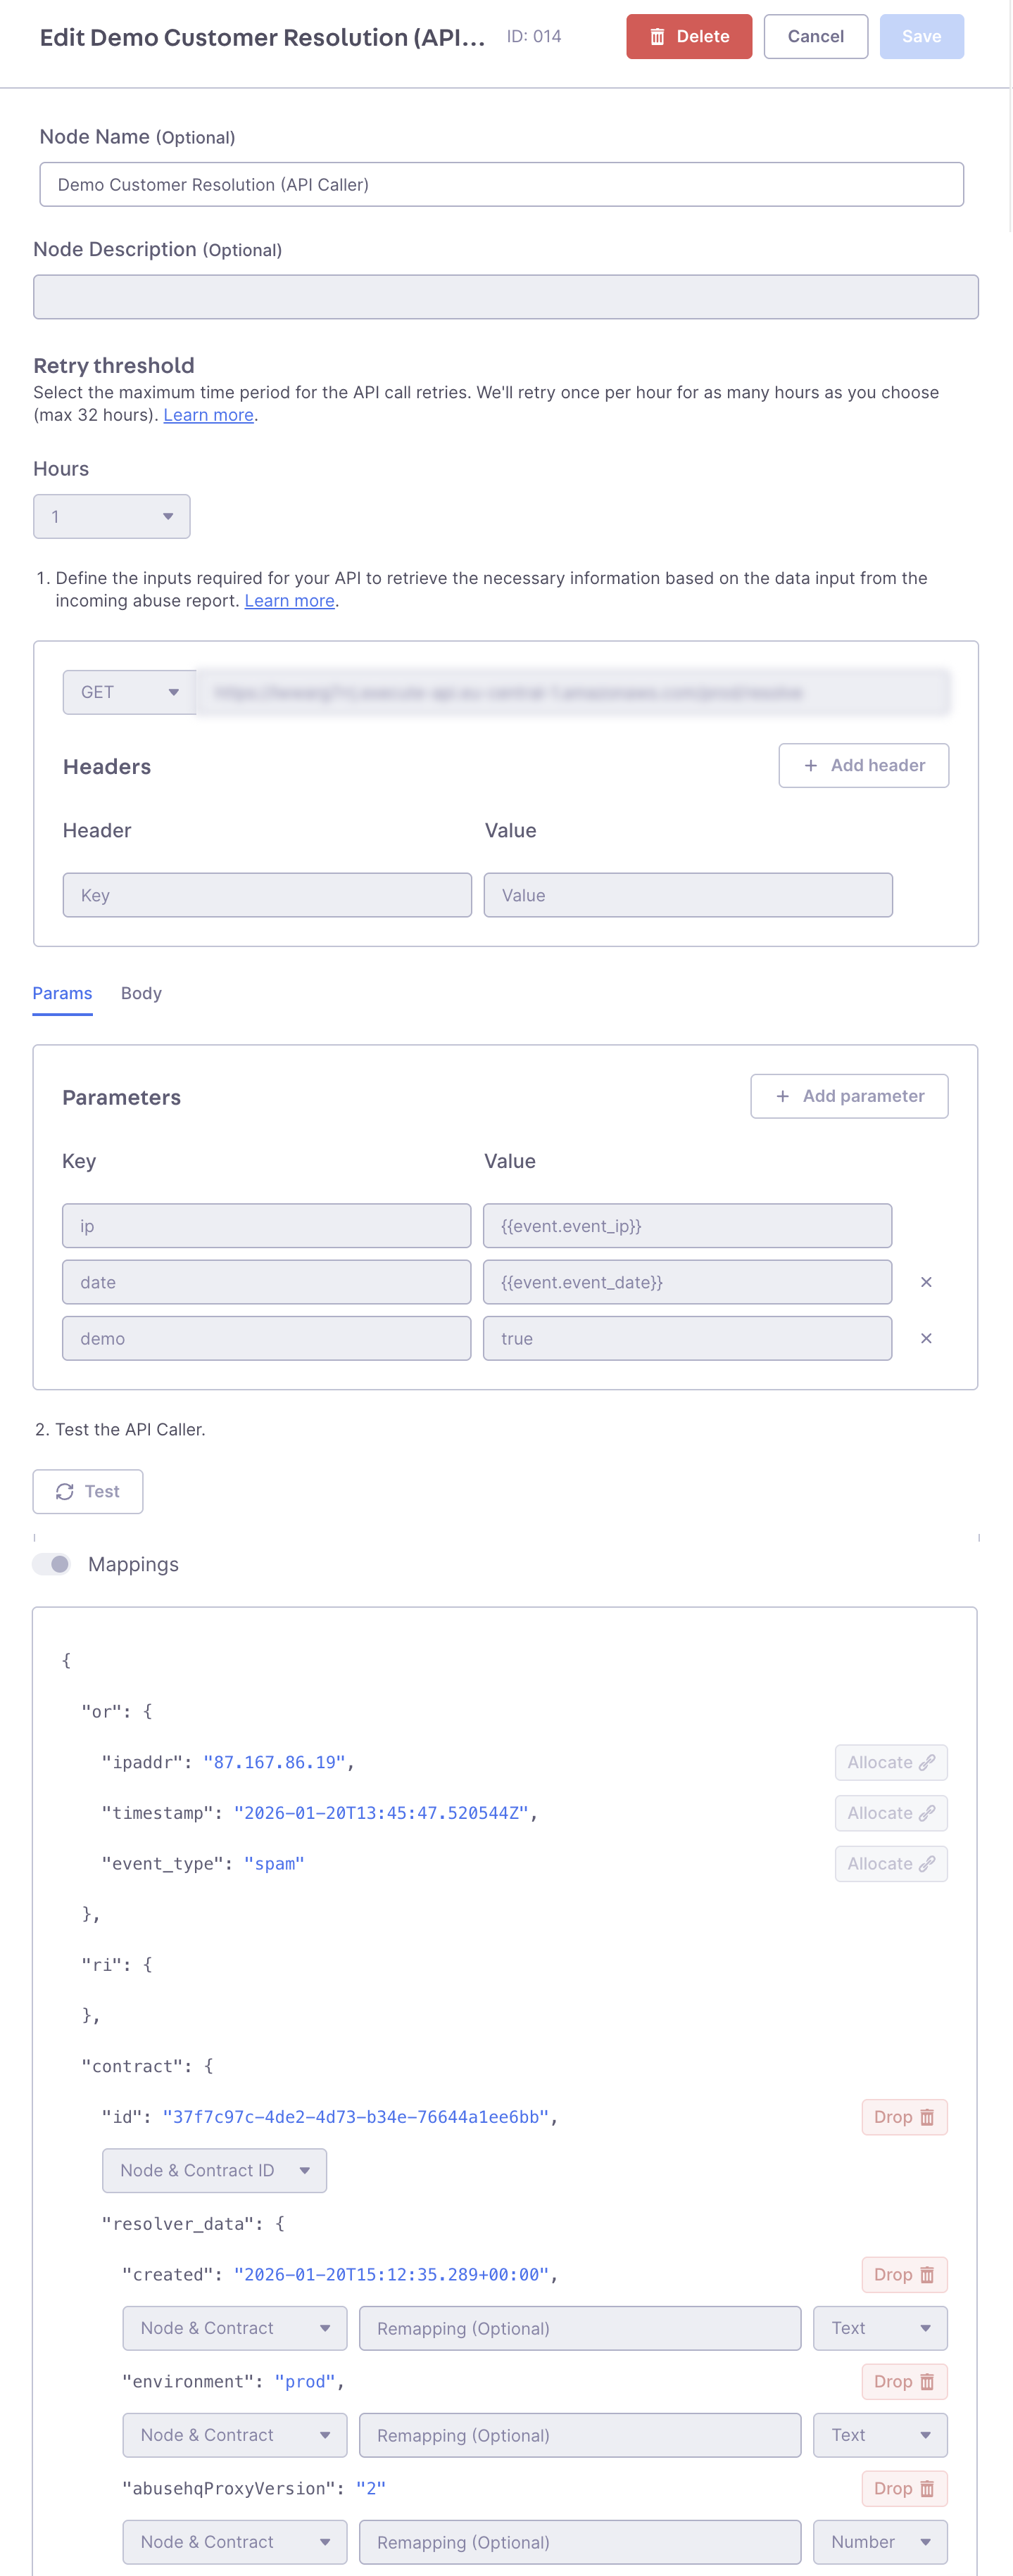
Common Use Case
Look up the customer assigned to an IP address at the time of an event using:IP addressEvent timestamp
How to Configure API resolution
- Go to app.abusix.com.
- Navigate to Settings → Guardian Ops → Inbound Processing
- Add an API Caller node to your workflow
- Provide the API endpoint and any parameters your API requires for resolution.
- Hit “Test” to test credentials and receive a response to configure the mapping. To set up customer resolution, assigning a customer ID is required. Contract ID, tenant ID or fields related to these entities are optional. -> Contracts can be used to split your customers to separate automation later. For example, use contracts if you want fine grained control on which contract of a customer should be handled in automation.
- Save and continue to edit or activate your new Inbound Processing draft.
⚠️ If your API is behind a firewall, ensure the following IPs are in your allowlists and not blocked by any firewall: 18.193.183.51 | 52.57.46.129 | 18.158.191.233
API Caller Configuration: Complete setup showing API endpoint configuration, parameter mapping, and customer resolution fields.
💡 You can utilize the static resolver if you need time to expose an API or allowlist our IPs; By default, Guardian Ops sets the IP as customer ID.For more information on customer resolution, see the customer resolution documentation.
Step 4: Cases - Stepping Up Aggregation
Now that Guardian Ops receives your abuse reports and customer resolution is set up, it’s time to configure your first Case group, which will generate cases and fill your Case view. This helps you funnel your abuse reports into Cases which you can then set up automation for according to the needs of your abuse desk. For example, you could set up a flow that routes all copyright and spam reports to separate case groups while dropping everything else. Cases also lay the groundwork for automation with playbooks in Step 5.Case Groups
Case groups are like buckets that cases end up in depending on a special ruleset. The configuration of case groups and their flows is done within inbound processing. A case group ends a path in your Inbound Processing flow. All cases and, therefore, events with attributes matching the rules of that path will fall into that group and end their journey through the flow.Create Your First Case Group
- Click Settings under Guardian Ops in the left-hand menu, where the Inbound Processing tab is located.
- Click Edit to update a configuration, duplicate another configuration, or start from scratch.
- Drag and drop the Case Group Node from the top left list of nodes, and place it in your flow.
- Select or create a case group in the drop-down field.
- Click Save to set the changes on the case group.
- Click Done editing to save the Inbound Processing configuration.

Step 5: Use Playbooks to Automate
It’s time for the final piece of the puzzle: Playbooks. With playbooks, you can manually or automatically handle your cases according to the individual needs of your abuse desk processes. Playbooks offer similar flows to Inbound Processing but operate on cases. You can configure task nodes such as Delay, Wait until…, API Caller, Resolve, or apply straightforward rules to case attributes with the True/False node. See the node reference for details. Because processes vary for each abuse desk, customer group, and even event type, each case group can have a playbook assigned individually.Managing Playbooks
Before you can assign a playbook to a case group, you need to create one.- Click Settings under Guardian Ops in the left-hand menu, where the Playbooks tab is located.
- Click New Playbook and provide a name in the prompt (e.g., ‘copyright’ if you want to handle copyright cases specifically).
- In the second prompt, provide a version name such as Version 1.
- Click Edit to edit the newly created playbook.
- Drag and drop a node of your choice into the grid.
- Click the newly added node to set the node configuration.
- Repeat these three steps for all tasks you need in this playbook.
- Click Done editing.
- Go to the Inbound Processing Settings and select the flow that contains the case group to which you want to attach your created playbook.
- Click the case group and select the playbook in the drop-down.
- Save the case group and click Done editing.