Overview
For AbuseHQ, networks are useful to drop abuse reports during Inbound Processing that don’t belong to the network(s) you maintain.
You can also tag your networks, then filter for certain values during Inbound Processing as well.
Network List
On https://app.abusix.com/networks, there’s a table with all available networks. There are 3 sources for networks:
- Manually inserted CDIR blocks
- Abuse contacts address
- ASN’s numbers
Each entry displays the network, along with name, source, and associated tags.
You can filter the network list by their verified or unverified status, as related to their corresponding abuse contacts.
To display the networks associated with an abuse contact, it must be first verified.
The search bar also allows filtering specific fields (Like IP, name or source, and tags)
When networks come from different sources, you’ll see one entry per each source you have.
Each network will display the data that comes from its source. If you want to add extra data to an individual network, press the “Edit” button, and it will create a new manual copy of it with the extra data you’ve saved.
Adding Networks
You can add new networks in 3 different ways. Pick the tab of the source you need, and press the blue button, to add a new entry.
Add the fields in the form, then save your entry with the controls at the top

Manual Network
The main field is the network address. Name and other fields are there to help you organize.
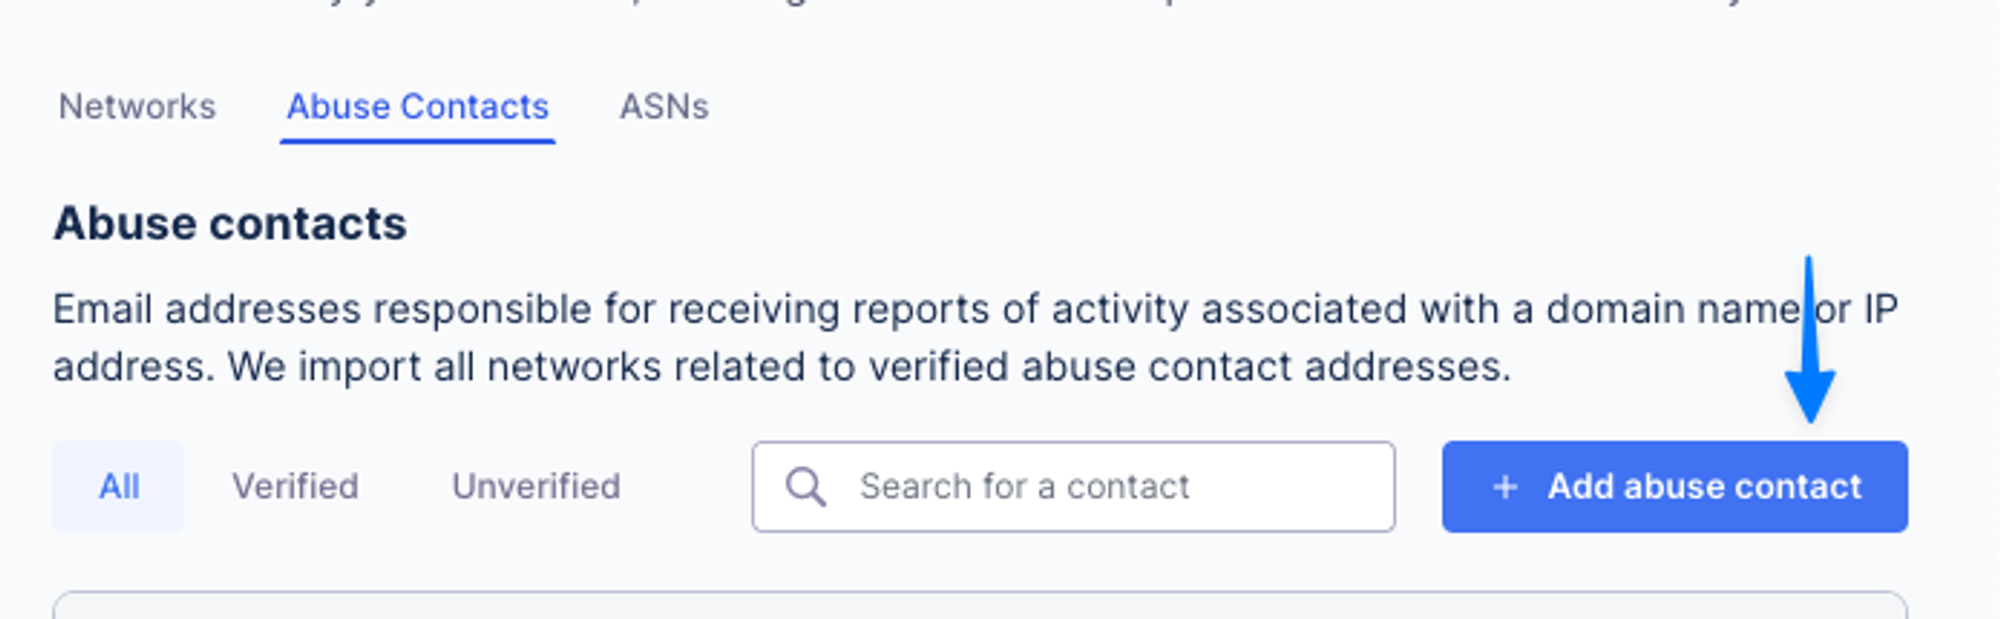
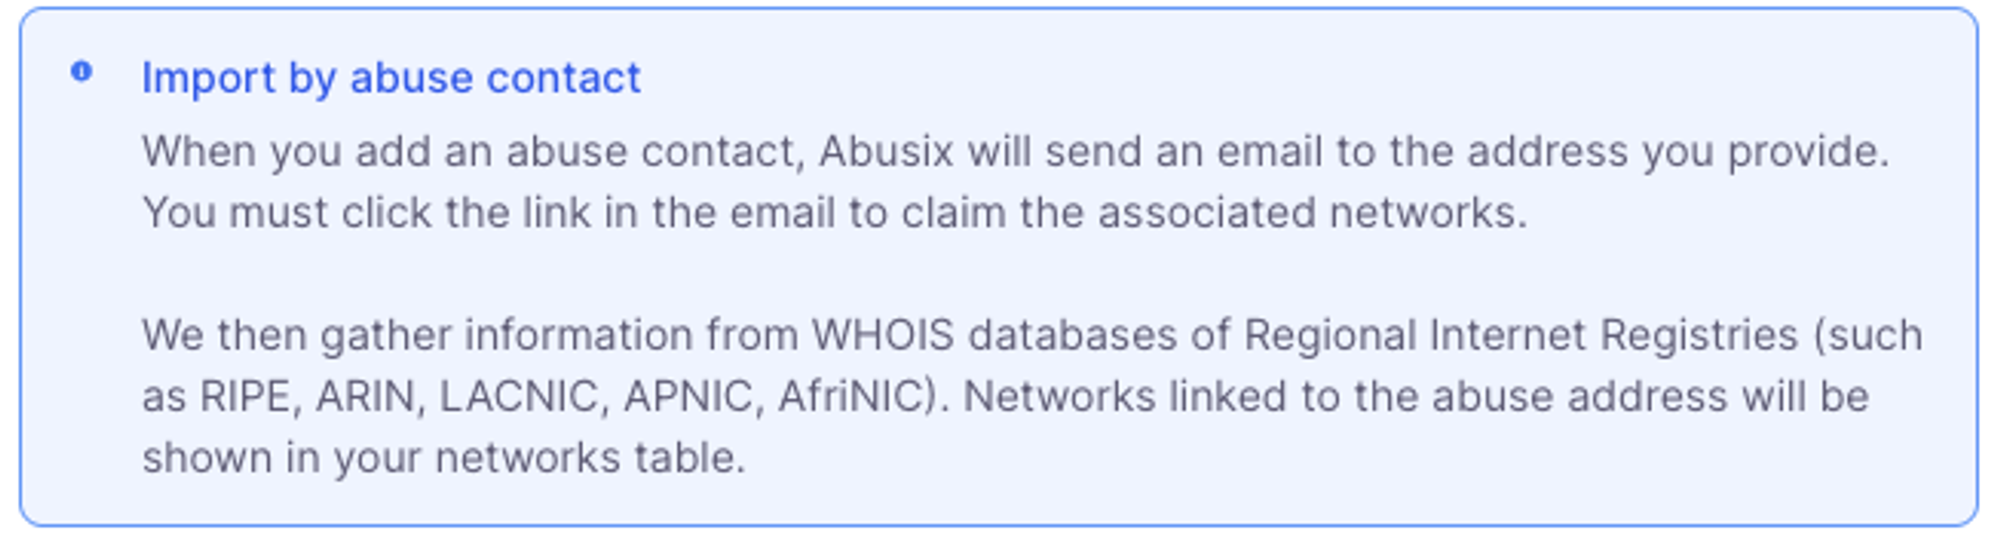
Abuse Contact
When adding a contact and verifying it, we’ll display the networks that have that address set up as their abuse contact. Description and tags are to help you organize.
Once you add a contact, you need to verify it via email. Only verified contacts will import the associated networks.
ASN
ASNs will import associated networks, their network names, and their contacts.
The verification status depends on the associated abuse contacts, if you already have a verified contact it will inherit the status; otherwise, you need to go through the verification flow.

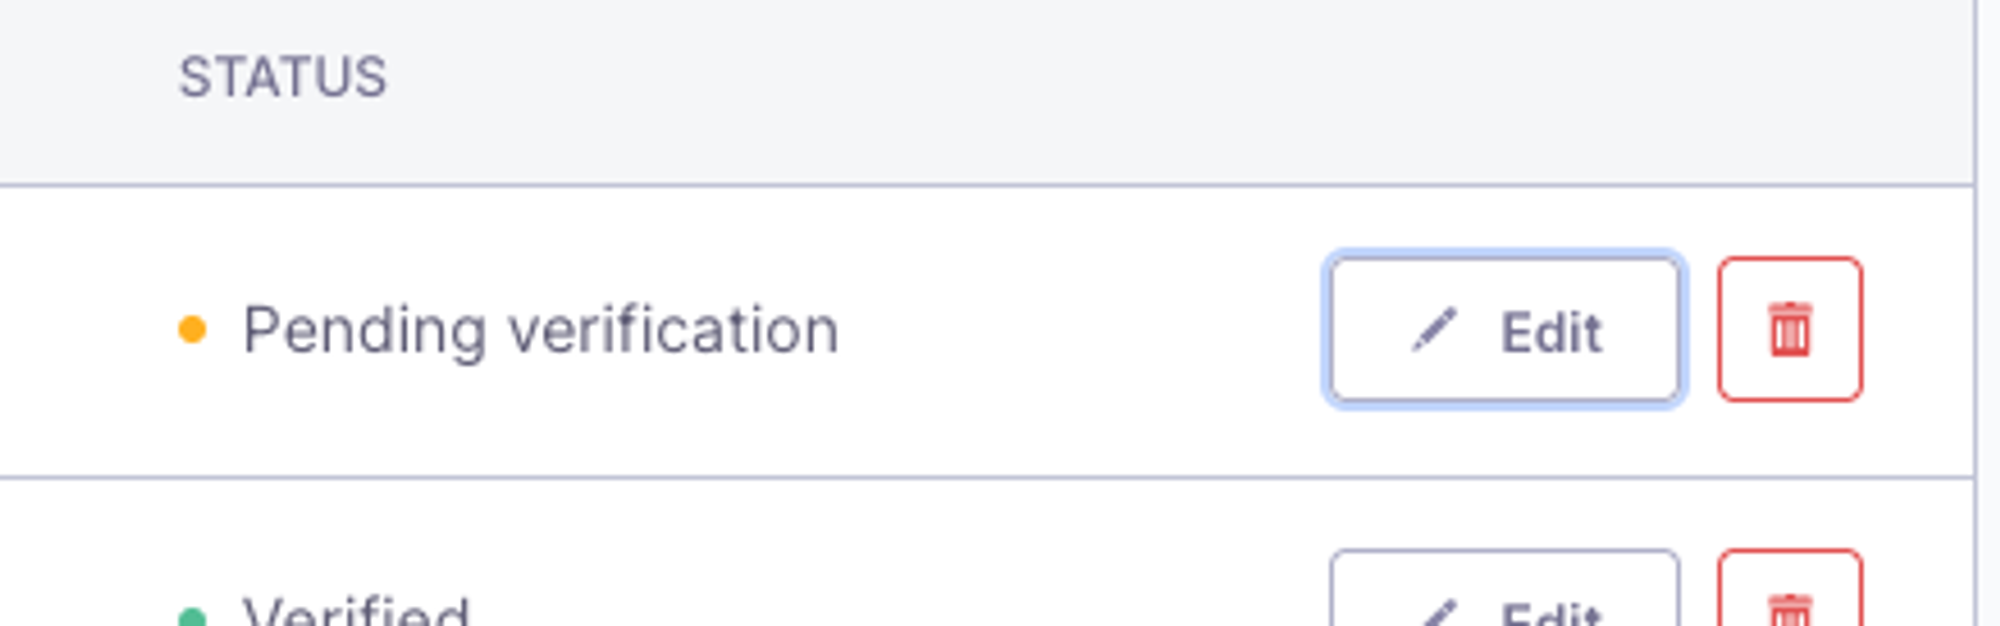
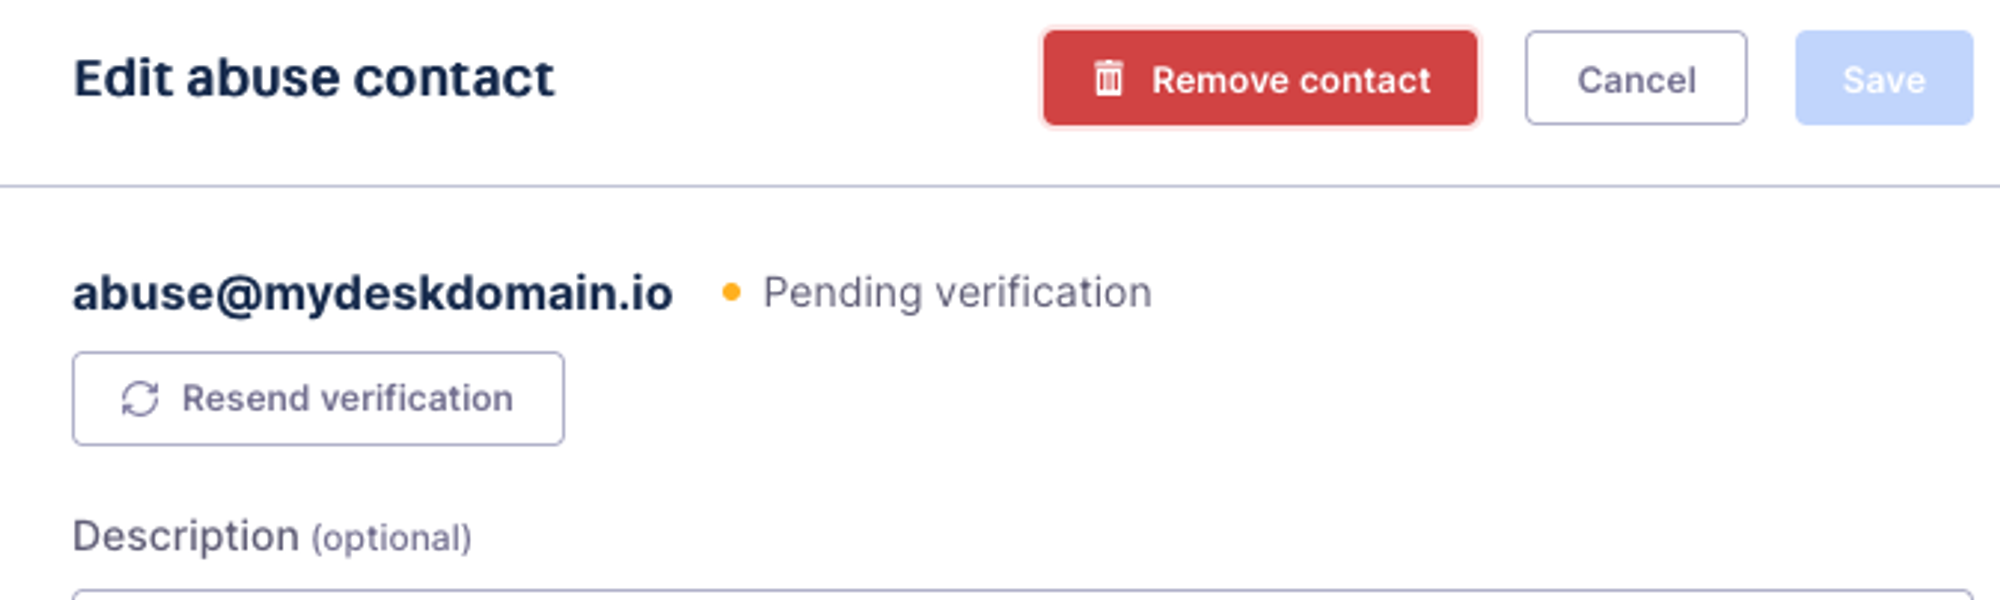
Contact Verification
When adding a contact, it needs to be verified. This is done via an email, which contains a link that allows you to verify the contact. The current verification status is displayed in the table.
To resend the verification email, edit the contact, then press the button to resend the verification email
Deleting Data
To delete networks, you need to delete the field that originally imported it. This means that on the main network page, you can only delete manual networks, otherwise, you’ll see this message:
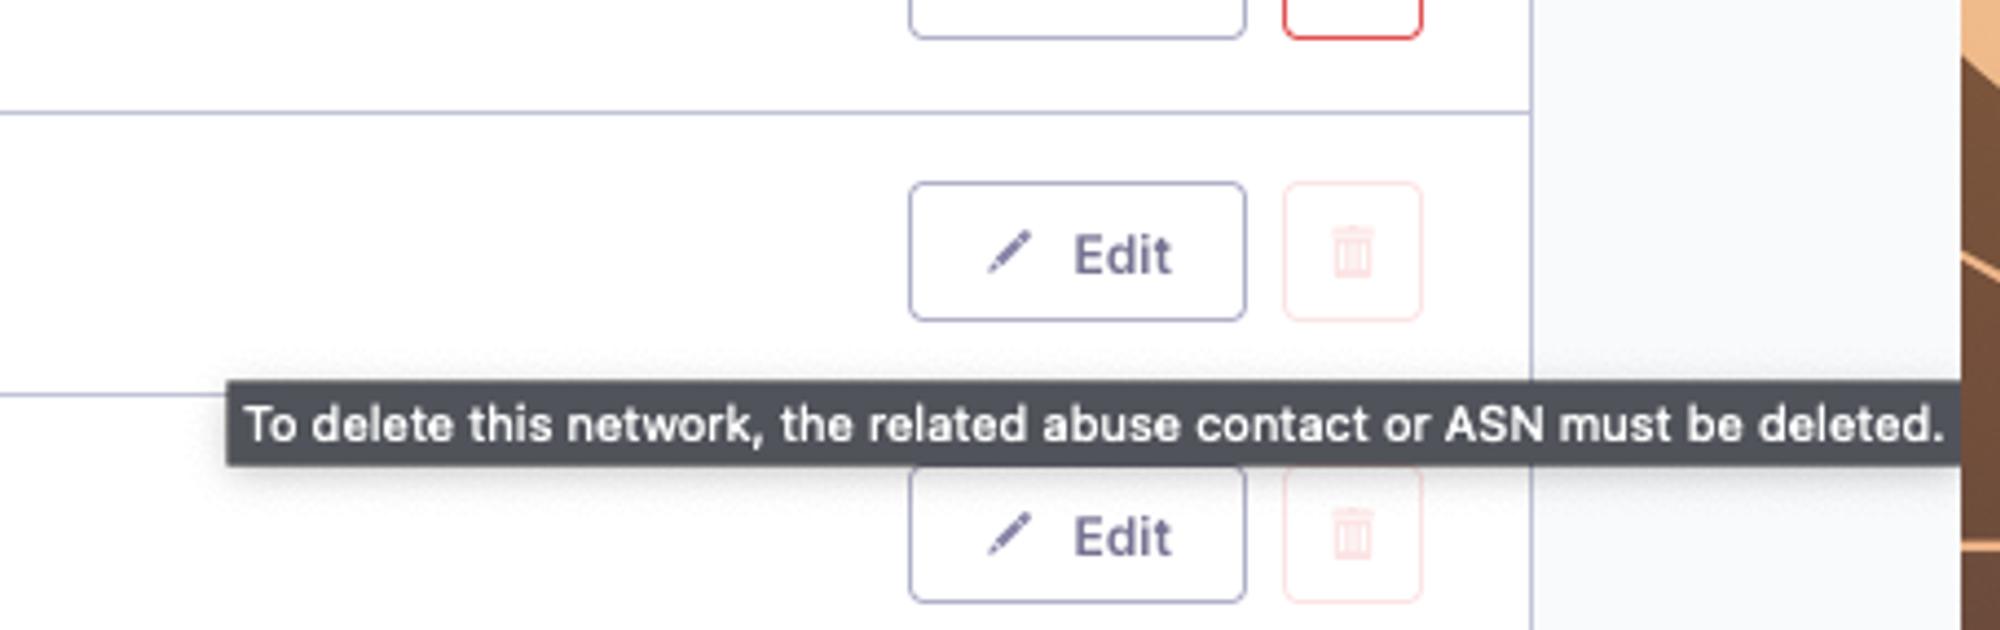
When you delete a contact or an ASN, all the related networks will be removed as well
Send us a message
Having trouble with your setup or a technical issue? Get in touch with our team of Abusix experts.
Click the chat button at the bottom and send us your questions. Alternatively, you can email us at support@abusix.com
also, follow our LinkedIn Channel for updates & subscribe to our YouTube Channel for the latest Abusix how-to-videos.