> ## Documentation Index
> Fetch the complete documentation index at: https://docs.abusix.com/llms.txt
> Use this file to discover all available pages before exploring further.
# Configuring Playbooks
**Playbooks** are powerful workflow tools in AbuseHQ that allow you to move through new cases quickly—either manually or automatically.
***
## Accessing Playbooks in AbuseHQ
To configure Playbooks:
1. Open the **Admin Portal** in AbuseHQ.
2. Click **Settings** in the left-hand menu.
3. Under **Automation**, click **Playbooks**.
***
## Creating a New Playbook
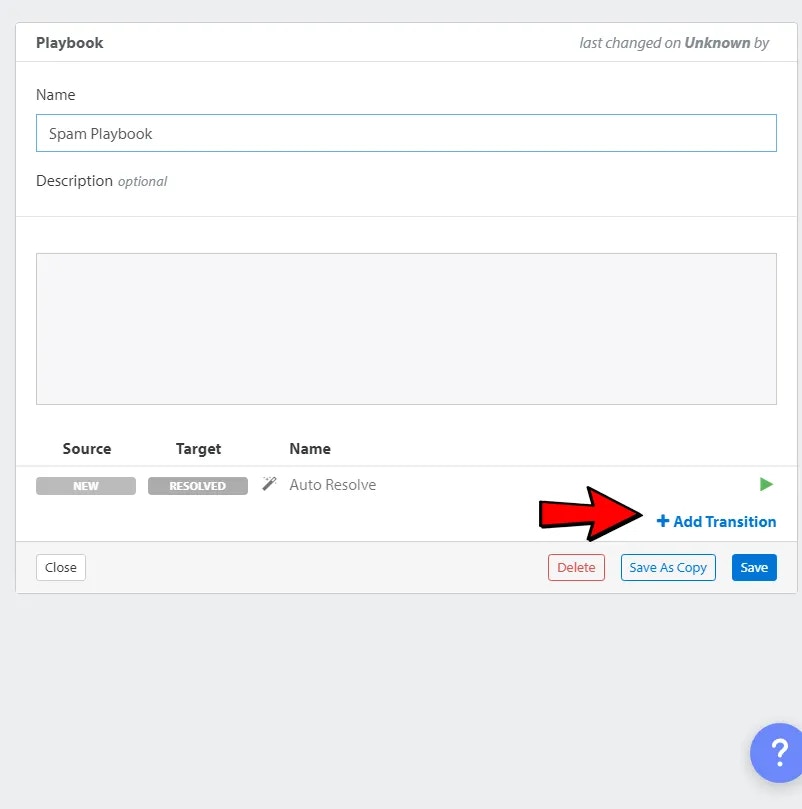
1. Click the **Add new Playbook** button.
2. Enter a **name** for the Playbook.
> 💡 Tip: Choose a name that helps you identify it later.
3. Click the **Add Transition** button.
4.
 ## Creating a Transition (Step 1)
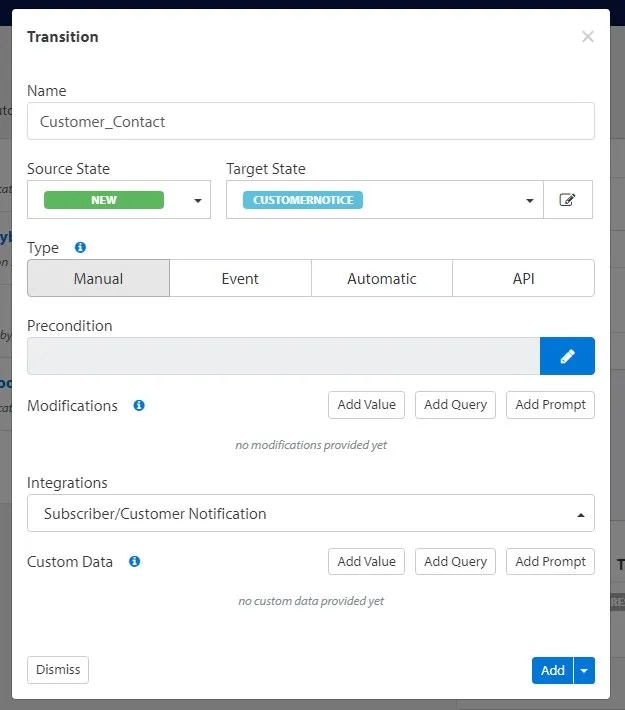
1. **Enter a name** for this transition.
2. In the **Source State** dropdown, select: `NEW`.
3. In the **Target State** dropdown, click `+ new State` and name it (e.g., `CustomerNotice`).
4. Under **Type**, select: `Manual`.
5. In the **Integrations** dropdown, select the **Mail Template** you previously created for notifications.
6. Click **Add/Apply**.
## Creating a Transition (Step 1)
1. **Enter a name** for this transition.
2. In the **Source State** dropdown, select: `NEW`.
3. In the **Target State** dropdown, click `+ new State` and name it (e.g., `CustomerNotice`).
4. Under **Type**, select: `Manual`.
5. In the **Integrations** dropdown, select the **Mail Template** you previously created for notifications.
6. Click **Add/Apply**.
 ***
## Creating a Transition (Step 2)
Now we’ll add another transition to continue the workflow:
1. Click **Add Transition** again.
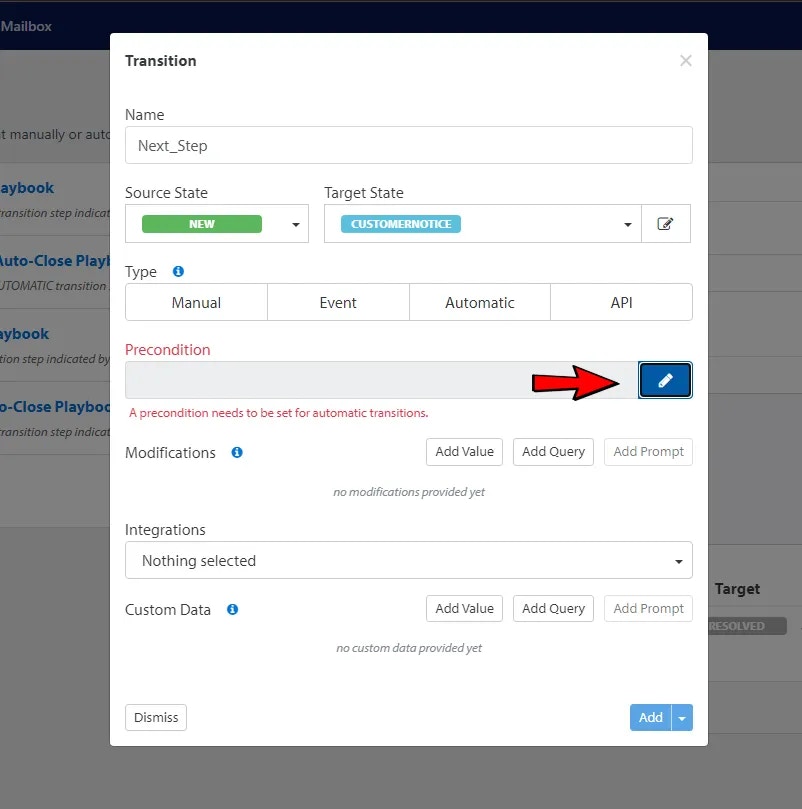
2. **Enter a name** for this transition.
3. For **Source State**, select: `CustomerNotice` (the one we just created).
4. For **Target State**, select: `Resolved`.
5. Under **Type**, select: `Automatic`.
6. Click the **pencil icon** next to the **Precondition** field to define a condition.
***
## Creating a Transition (Step 2)
Now we’ll add another transition to continue the workflow:
1. Click **Add Transition** again.
2. **Enter a name** for this transition.
3. For **Source State**, select: `CustomerNotice` (the one we just created).
4. For **Target State**, select: `Resolved`.
5. Under **Type**, select: `Automatic`.
6. Click the **pencil icon** next to the **Precondition** field to define a condition.
 ***
## Defining a Precondition
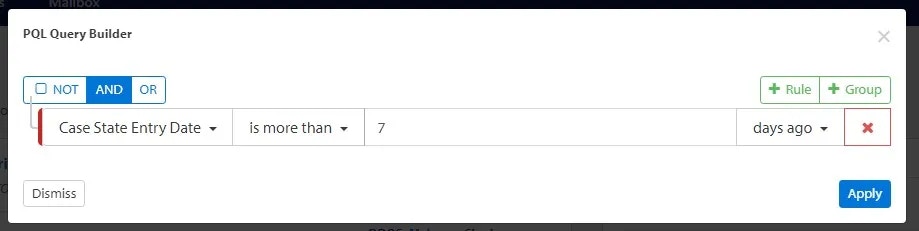
1. Click the **Rule** button.
2. For **Event Type**, select: `Case`, `State Entry Date`.
3. For the operator, select: `is more than`.
4. For the time range, enter: `7 days`.
5. Click **Add/Apply**.
***
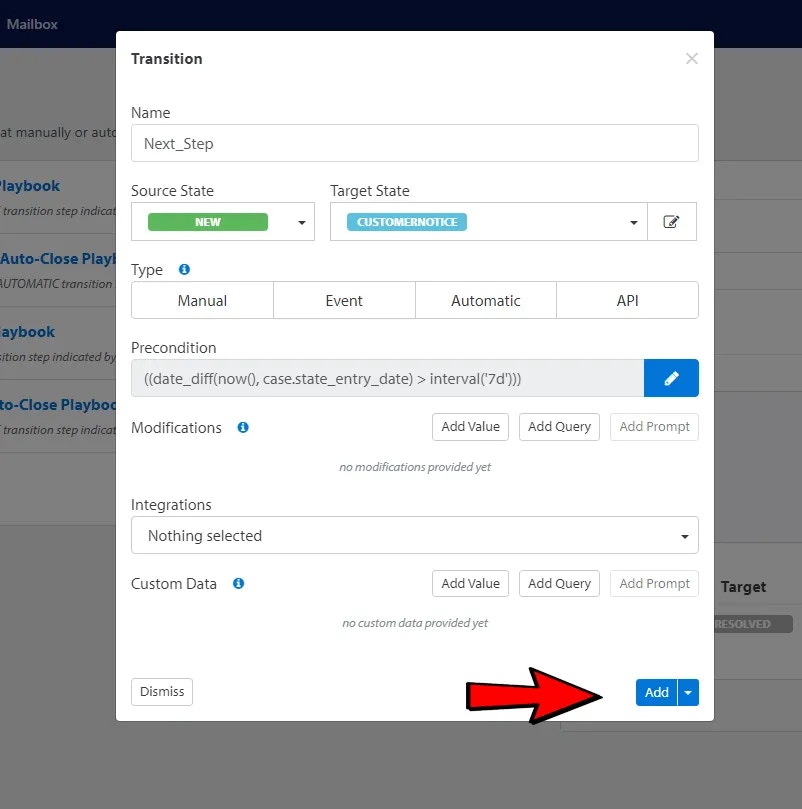
## Defining a Precondition
1. Click the **Rule** button.
2. For **Event Type**, select: `Case`, `State Entry Date`.
3. For the operator, select: `is more than`.
4. For the time range, enter: `7 days`.
5. Click **Add/Apply**.
 You’ll be brought back to the **Transition page**, and the **Precondition** field will now show the data you defined. Click the **Add** button.
 ***
## Finalizing the Playbook
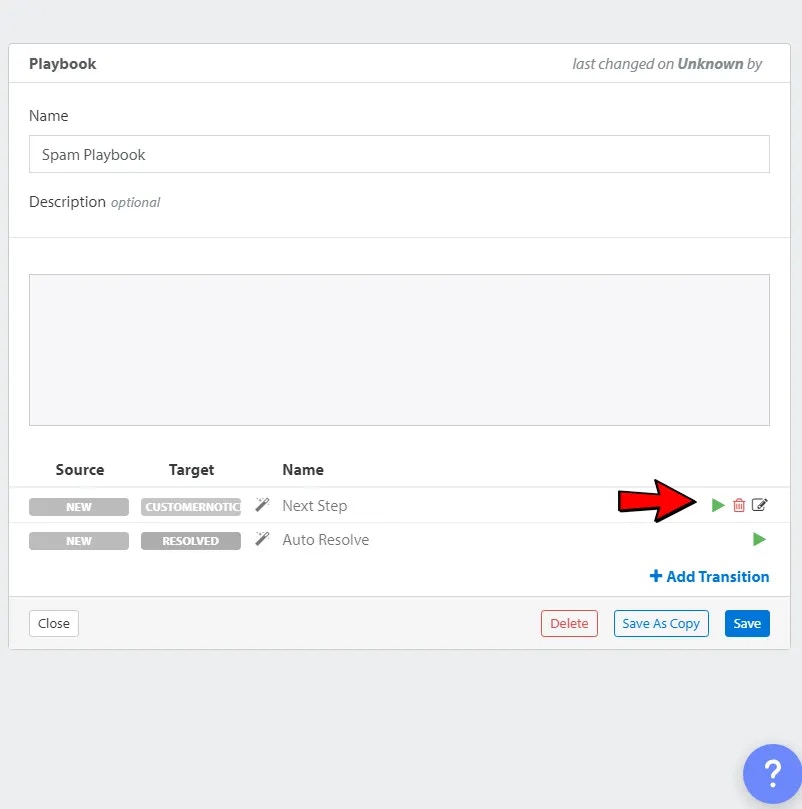
You’ll return to the **main Playbook page**.
1. Click the **green START arrows** to enable the transition steps.
***
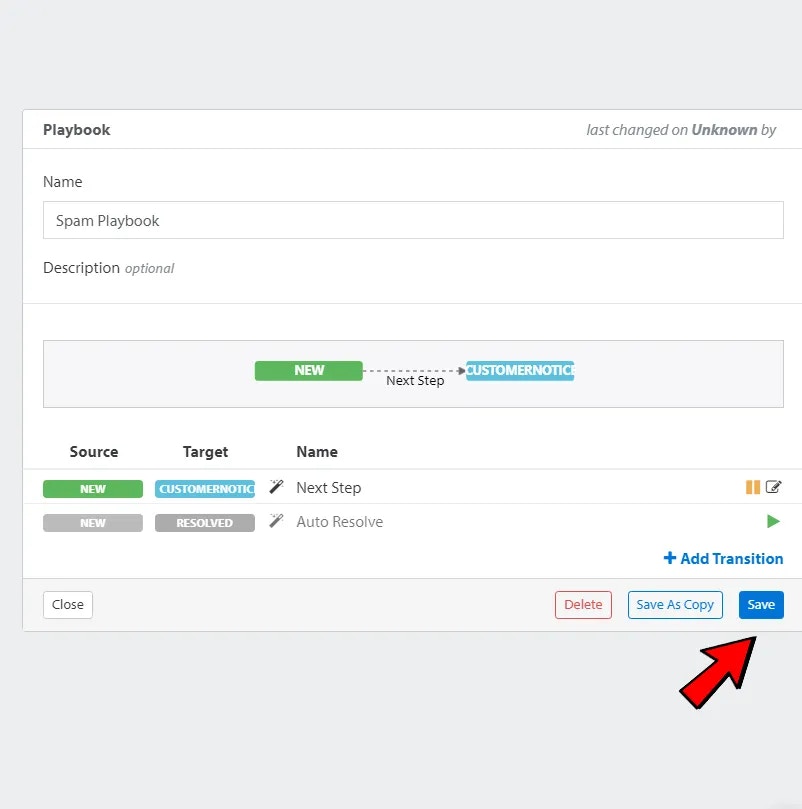
## Finalizing the Playbook
You’ll return to the **main Playbook page**.
1. Click the **green START arrows** to enable the transition steps.
 2. Click the **Save** button.
 ***
## Transition Types Explained
* **Manual** – A button appears on the case page if the precondition is met. Clicking it triggers the transition.
* **Event** – When a new event is added to a case, the precondition is evaluated and may trigger the transition.
* **Automatic** – The system periodically checks the precondition. If matched, the transition is triggered.
> Useful for time-based workflows (e.g., "after 14 days, go to the next state").
* **API** – This transition is triggered **only** via an API call. No UI button is displayed.
***
## Transition Types Explained
* **Manual** – A button appears on the case page if the precondition is met. Clicking it triggers the transition.
* **Event** – When a new event is added to a case, the precondition is evaluated and may trigger the transition.
* **Automatic** – The system periodically checks the precondition. If matched, the transition is triggered.
> Useful for time-based workflows (e.g., "after 14 days, go to the next state").
* **API** – This transition is triggered **only** via an API call. No UI button is displayed.